Pop Bumper - Top Half
Parts
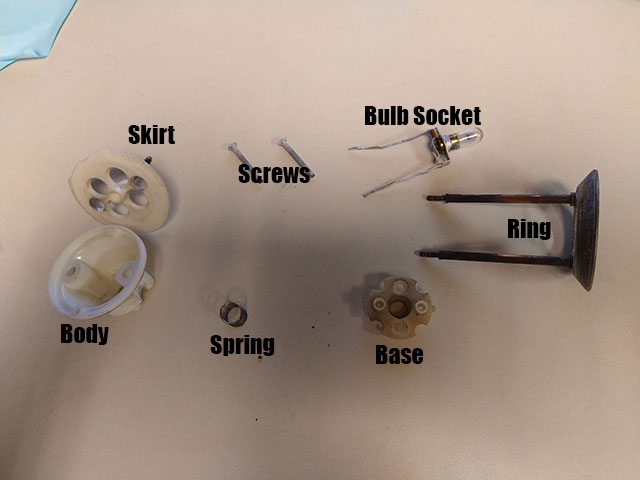
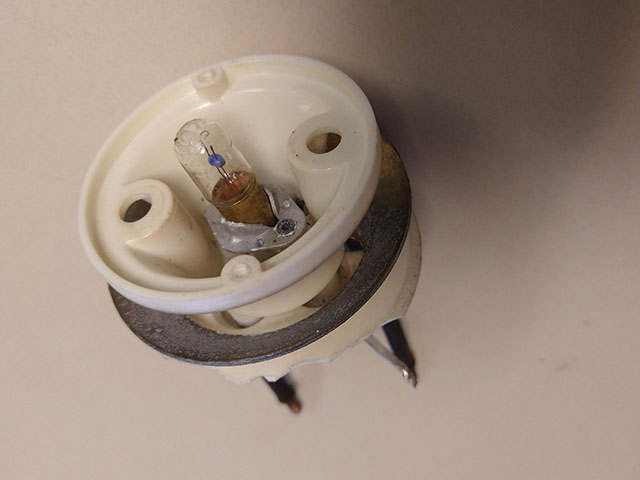
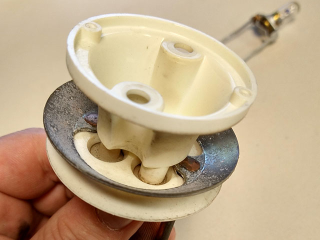
Here are all the parts that make up the top half of the pop-bumper.
Disassembly
Step #1
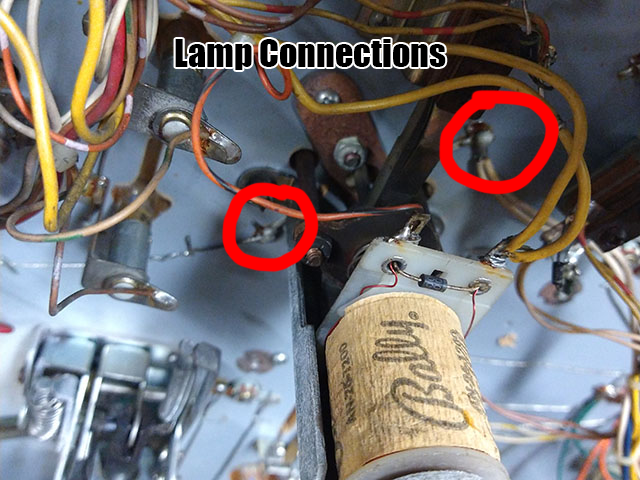
De-solder the lamp connections. If you lamp socket legs are stapled down you must remove the staples.
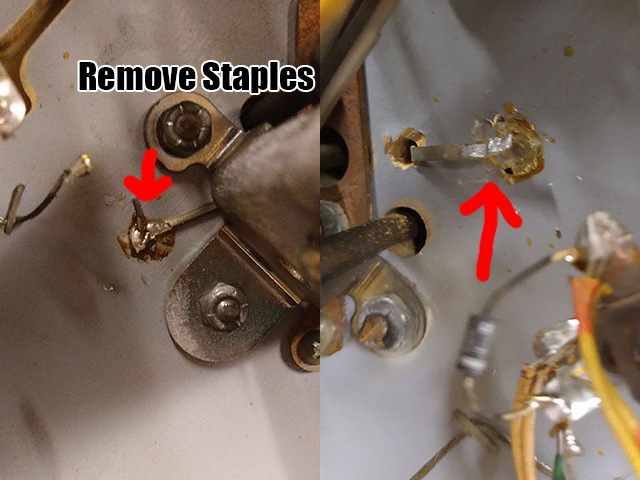

Note that if two wires are connected to one of your socket legs keep them connected to prevent any confusion during re-assembly.
Step #2
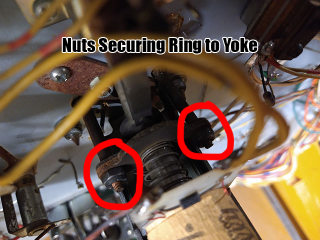
Remove nuts securing the ring to the yoke.

Step #3
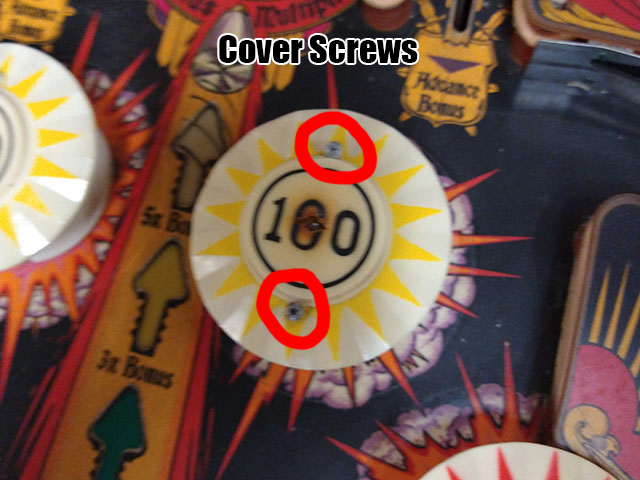
Remove the pop-bumper cap by removing the two small screws. On some games (Usually Gottlieb) the bumper cap will be snap-in instead of screwed down. Remove the cap on these games by lightly squeezing the cap at the sides, and it should pop out.
Step #4
Remove the screws securing the pop-bumper to the playfield.

Step #5
Make sure you have de-soldered your lamp socket, disconnected the ring, and removed the playfield screws. Grab the entire assembly and firmly pull. You may need to give it a little wiggle.

Step #6
Break down the complete assembly into it's smaller parts. At this point it should all come apart freely.
Pop Bumber Re-Assembly - Top Half
Normally you would be re-assembling your pop-bumper onto a playfield. For the purpose of this tutorial I will be re-assembling the pop-bumper on the bench for better views of the parts.
Step #1
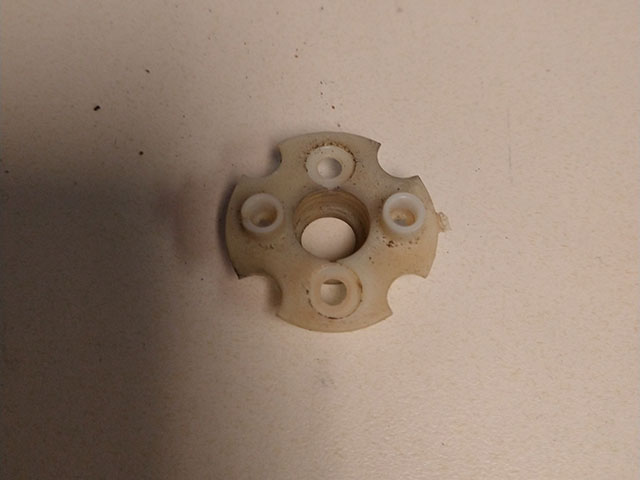
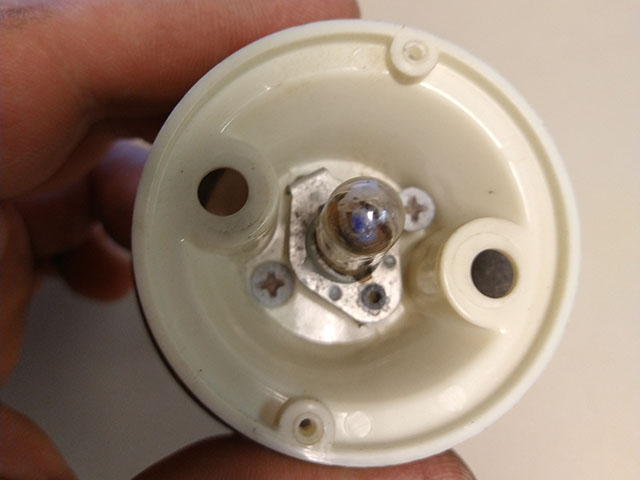
Place the base onto the playfield. Make sure to align the holes correctly. The holes that have spacers that stick up are for the lamp sockets. The holes that are flush with the base are the screw holes.
Step #2
Place spring into the center of the base. This spring is what lifts the skirt and prevents the switch from registering when it isn't being struck with a ball. This spring should be replaced if worn out.

Step #3
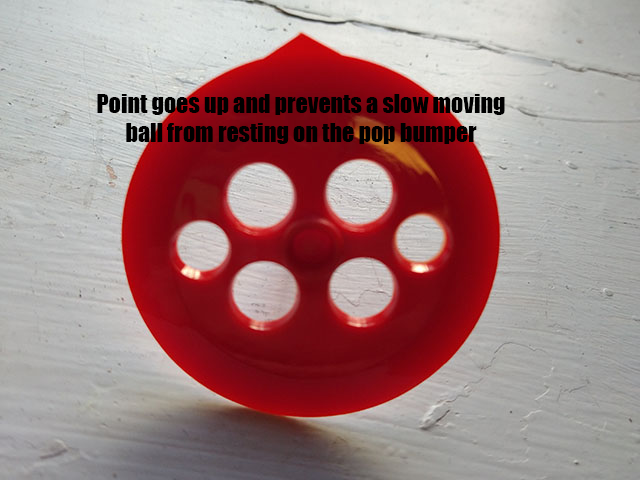
Place the skirt though the base, aligning holes. New skirts frequently come with a spike to prevent stuck balls. This spike should point towards the top of the playfield.

Step #4
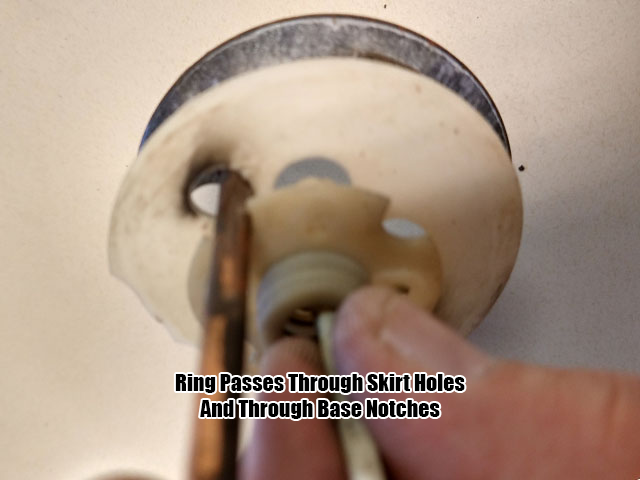
Place the Ring through the skirt. The rods from the ring will go through the outer holes of the skirt, through the notches of the base, and down to the bottom of the playfield.

Step #5
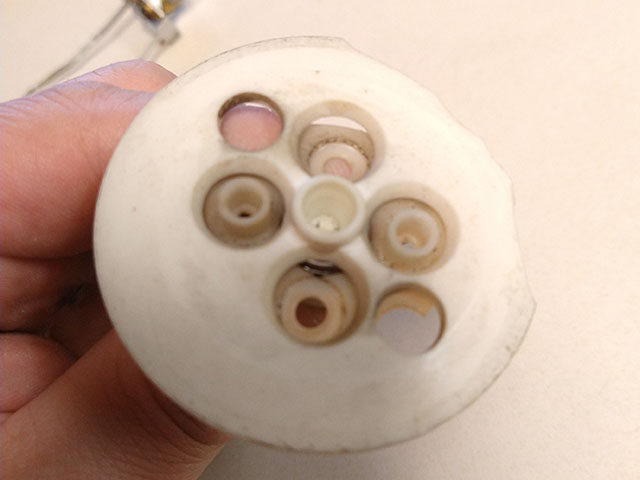
Place body onto base. The screw holes are flush with the bottom of the base. The lamp socket holes will have spacers sticking up from the body.
Step #6
Feed lamp socket legs down through lamp socket leg holes. Lamp socket holes will usually be protruding up from the bottom of the body.

Step #7
Screw pop-bumper down to playfield. If the pop-bumper has long threaded bolts instead of wood screws you may need to use a socket or wrench to hold the nuts on the underside as you tighten the bolts down.
Step #8
Re-attach ring to yoke with nuts.
Step #9
Re-solder the lamp sockets. Make sure the lamp socket legs do not touch anything else metal. It is best to re-staple the legs down, or use heat shrink tubing to prevent them from shorting to the coil bracket. Make sure the assembly can move freely without striking any wiring.